
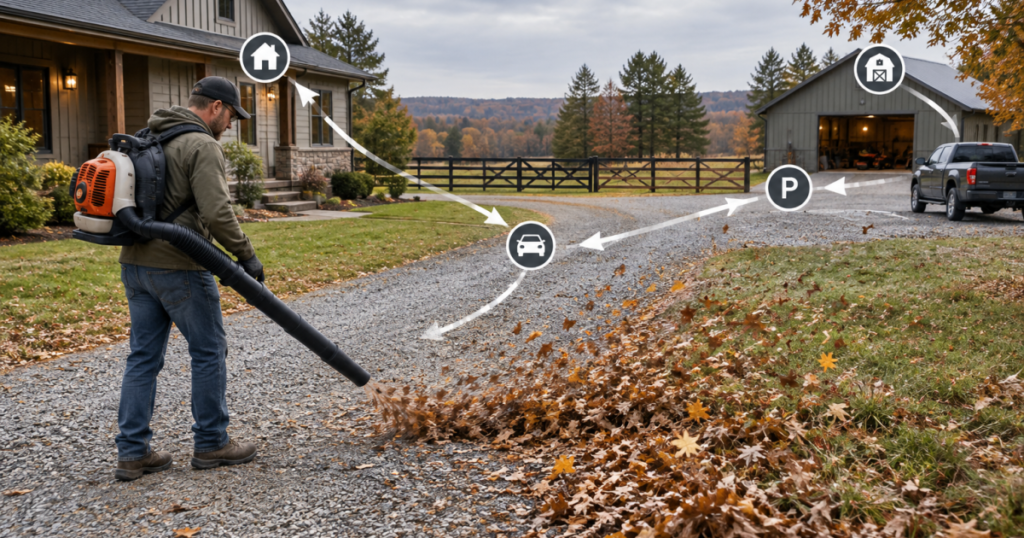
The first pass on a larger property should not start at the far fence or the biggest leaf pile. It should connect the places you use every week: the house, the driveway, the parking area, and the primary outbuilding. A first cleanup loop gives you one visible, repeatable route that improves access, reduces tracked-in mess, and keeps debris moving toward a destination instead of just pushing it around.
Use normal operator protection when running blowers, vacuums, sweepers, tractors, or carts around dust, gravel, dry leaves, and thresholds. Eye protection, hearing protection, gloves, and steady footing matter more than finishing ten minutes faster.
What to know first
- Start with the most-used path, not the biggest mess.
- Choose one debris destination before any blowing or sweeping begins.
- Work from clean surfaces toward rougher edges so you are not re-contaminating finished areas.
- Keep gravel, drainage ditches, door tracks, and barn thresholds in mind before deciding direction.
- Make the route small enough to finish in one session; a completed loop beats a half-cleared property.
The point is not to manicure every acre. The point is to make the daily-use part of the property safer, cleaner, and easier to maintain the next time wind, leaves, dust, or a storm front roll through.
Start with the four anchor points
That is the job of a first cleanup loop: it links the house, driveway, parking area, and primary outbuilding into one practical circuit. These four points usually control how people, vehicles, pets, tools, feed, firewood, trash cans, and deliveries move through the property. If they are clean enough to function well, the whole place feels more under control.
Begin at the house because it is where tracked-in debris becomes most annoying. Porches, steps, garage aprons, basement entries, and mudroom paths deserve first attention. You are not trying to push every leaf into the woods from here. You are trying to clear the surfaces where people walk, where doors swing, and where wet leaves can turn slick.
Next, connect that clean area to the driveway. On a long gravel drive, the goal is not a bare, decorative surface. It is open tire paths, visible edges, working drainage, and no leaf mat packed into low spots. Gravel changes the job because too much nozzle pressure aimed too low can scatter stone into grass, ditches, or the parking pad.
The parking area comes next because it collects debris from tires, shoes, wind eddies, and nearby trees. Clear the walking lane from vehicle doors to the house, then open the turn-around or backing area. Finally, tie the loop to the main outbuilding, whether that is a barn, workshop, equipment shed, detached garage, or feed room.
Pick the debris destination before starting
A cleanup route fails when every pass creates a new pile that has nowhere to go. Decide where each debris stream belongs before you fire up the machine. Dry leaves might go to a leaf-mold pile, mower-mulch area, compost corner, wooded edge, or tarp pickup point. Gravel, grit, and dust should not be blown into door tracks, animal areas, air intakes, or drainage paths where it will become tomorrow’s problem.
For a first pass, choose one main destination and one backup edge. The main destination handles the bulk of the leaves or light debris. The backup edge catches what you cannot reasonably collect in the same session. That keeps the job moving when wind changes, piles get too heavy, or the route takes longer than expected.
Think downhill, downwind, and away from thresholds. If the wind is coming toward the house, reverse the route or postpone the dusty parts. If the ground slopes toward a ditch, keep piles above the ditch until you are ready to collect or relocate them. A ditch full of leaves may look tidy for an hour, then clog the exact drainage you need during rain.
Walk the route before moving debris
Before using a blower, mower, sweeper, rake, or cart, take five minutes to walk the full loop. Look for loose gravel, exposed roots, soft soil, animal holes, extension cords, hose ends, low branches, standing water, and anything that could become a projectile or trip hazard. This is also when you decide which areas are machine-friendly and which need a rake or broom.
Moisture changes the plan. Dry leaves move fast but kick up dust. Damp leaves move more slowly and may need to be loosened before they can be windrowed. Wet mats near steps or barn doors often need hand tools first. Fighting wet, packed leaves with full throttle usually wastes energy and spreads grit.
Wind also deserves respect. A light breeze can help carry leaves away from a driveway. A gusty crosswind can undo half your work. On bigger properties, it is often smarter to make shorter windrows across the route and collect them in stages than to try one heroic push across every open surface.
Divide the loop into working zones
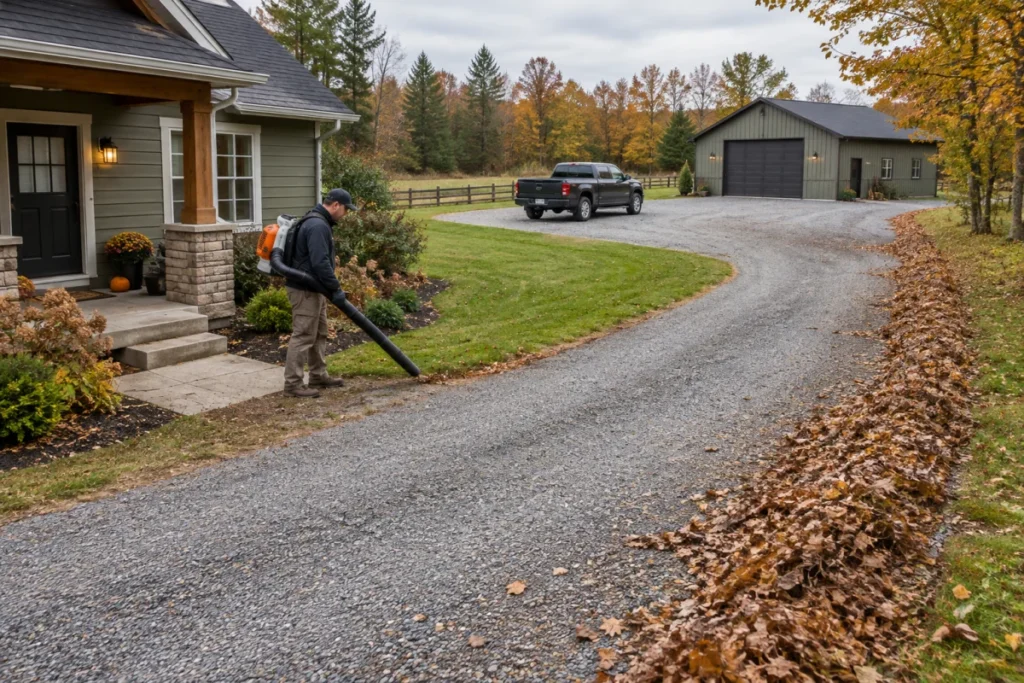
Zone 1: house edges and clean thresholds
Clear the house zone first, but do it gently. Blow or sweep away from doors, screens, window wells, vents, porch furniture, and garage tracks. If dust is heavy, start with a broom or lower air setting near the threshold and save higher force for the open apron. This prevents the classic mistake of making the outside look cleaner while pushing grit into the building.
Zone 2: driveway lane and parking pad
On gravel, use shallow angles and enough distance from the surface to move leaves without peeling up stone. Work from the center or tire lanes toward the edge you chose as the debris destination. If the driveway crowns in the middle, use that shape to your advantage. Keep leaves out of low drainage channels until you can move them past the water path.
On paved sections, you can usually use a cleaner, longer push, but the same rule applies: avoid blowing debris where tires will bring it right back. Parking pads need special attention around wheel stops, trailer tongues, equipment stands, and corners where wind piles leaves again overnight.
Zone 3: the primary outbuilding
The outbuilding zone is where cleanup becomes practical rather than cosmetic. Clear door swing areas, sliding-door tracks, feed-room entries, shop thresholds, and the path between parked equipment and the main route. Keep dust and chaff from being driven into interiors. If animals use the building, keep debris movement controlled and avoid stirring up more dust than needed.
Match the machine to the route
The right equipment depends on the surfaces, debris volume, session length, and how you will collect or park the pile. A handheld blower can be ideal for porches, garage aprons, truck beds, and quick resets. A backpack blower makes more sense when the loop includes long driveway edges, heavy leaf volume, or repeated fall passes. Walk-behind and tow-behind tools can help where access is open, but they are awkward around roots, tight gates, parked trailers, and narrow building lanes.
If you are deciding between machine formats, use the route as the test. Ask whether the machine can travel the whole loop, whether it will fatigue you before the job is done, whether it can work near gravel without making a mess, and whether it fits your storage and fuel or battery routine. For a deeper equipment-by-route breakdown, see how to match the machine to the cleanup route.
A simple sequence that works
- Walk the loop and remove hazards by hand.
- Set the debris destination and backup edge.
- Clear house thresholds, steps, and entry paths first.
- Open the travel lane from the house to the driveway.
- Work the driveway in short sections, protecting gravel and drainage.
- Clear the parking area from vehicle doors outward.
- Finish at the primary outbuilding and keep dust out of doors.
- Collect, mulch, compost, or park the debris so it will not blow back overnight.
This sequence keeps clean areas behind you and unfinished debris ahead of you. It also gives you natural stopping points. If weather changes or daylight runs short, you still have a useful result instead of four disturbed messes.
Where the plan changes
Wooded lots usually need more frequent, lighter passes because leaves keep dropping and wind reloads the same pockets. Horse properties and small livestock setups need more care around dust, feed areas, gates, and footing. Long gravel drives need patience with throttle control and destination planning because the surface itself can become part of the mess if you rush.
The same loop can look very different from one property to the next. A wooded drive may need staged windrows and tarp pickup. A barnyard may need broom work near thresholds and a cart for heavier debris. A long open lane may benefit from working with the prevailing wind and collecting at a wide turnout. For scenario ideas, browse cleanup transformations for wooded lots, horse properties, and long gravel drives.
Straight answers
How big should the first route be?
Keep it to the area you can finish in one steady session, often the route from the main entrance to the driveway, parking area, and one outbuilding. If you finish with time and energy left, extend the loop next time rather than making the first one too large.
Should the outbuilding or driveway come first?
Start where debris affects daily use most. For most properties, that means house entries first, then driveway and parking, then the outbuilding. If the outbuilding is where tools, feed, or vehicles are needed immediately, pull it earlier in the sequence.
What if there is too much debris for one destination?
Split the material by type. Light leaves can go to a compost or leaf-mold area. Sticks and brush may need a separate pile, cart, chipper plan, or disposal method. Gravel and grit should stay out of organic piles when possible.
What to remember
A first cleanup loop is a repeatable property routine, not a one-time attack on every messy corner. Link the house, driveway, parking area, and primary outbuilding. Choose the debris destination before starting. Work from clean thresholds toward rougher edges. Match the tool to the route, not to acreage alone.
Once that core circuit is under control, the rest of the property becomes easier to handle in sections. You can add a woodpile spur, a garden lane, a second shed, a trail entrance, or a back gate later. The first win is a route you can repeat without rethinking the whole property every time leaves, dust, or storm litter show up.
When gear recommendations appear on this site, they are handled editorially; the affiliate disclosure explains how that works.